
When my Hennessy Hammock Expedition first arrived I was a little overwhelmed when it came to setting it up. Previously all of the hammocks that I had owned came equipped with carabiners or hooks which meant an easy setup with no knots to tie. Now that I had bought a real camping hammock I had to learn how to set it up.
Learning how to set up Hennessy Hammocks is easy. The model that I’m using is the Hennessy Hammock Expedition Asymmetrical Zippered. From looking on their website it appears that all of their hammocks are set up using this manner.
First I will teach you the official method of how to set up Hennessy Hammocks. After that, I will teach you a couple of other ways that you can set up your hammock, but you will have to do a few modifications. Just remember to always make sure that you’re setting up your hammock correctly and that you are doing any modifications to your hammock or equipment is at your own risk.
Contents
What You Are Dealing With:
Before setting up your Hennessy Hammock you need to be familiar with what it is that you have. If you are used to parachute hammocks then it won’t be long before you realize that you have something completely different in your hands. What you get with a Hennessy Hammock is a suspension system that holds up the hammock, the Ridgeline, and the rain fly.
While most suspension systems on parachute hammocks are made from nylon webbing, your Hennessy Hammock’s suspension is made from a polyester cord. There is no clip or carabiner on the end of this cord so you are going to have to attach it to the short straps that were included using a knot. (Technically what you’re going to be tying is a Hitch)
How to Officially Set Up a Hennessy Hammock
When I got my Hennessy Hammock it came with directions on how to set it up on the back. if you’re not familiar with tying knots then this is going to be a little bit difficult To understand because the language on the bag gives you the directions as if you do.
Here is how I set mine up:
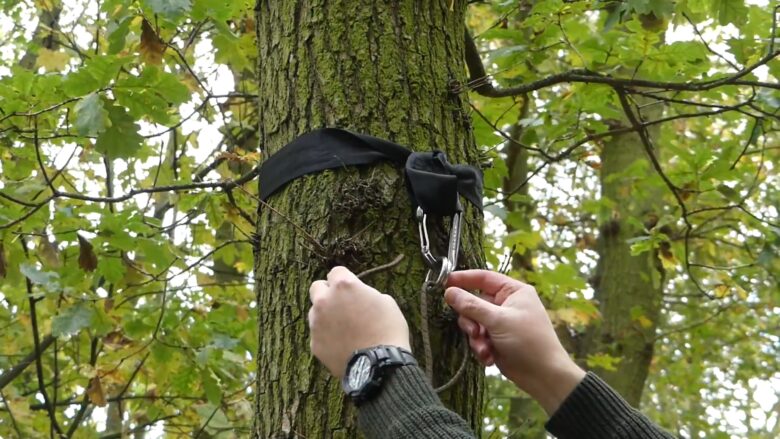
- First I take my straps and I wrap it around the tree once. I then feed one loop through the other facing the direction that I want to hang the hammock in. This gets done on both sides.
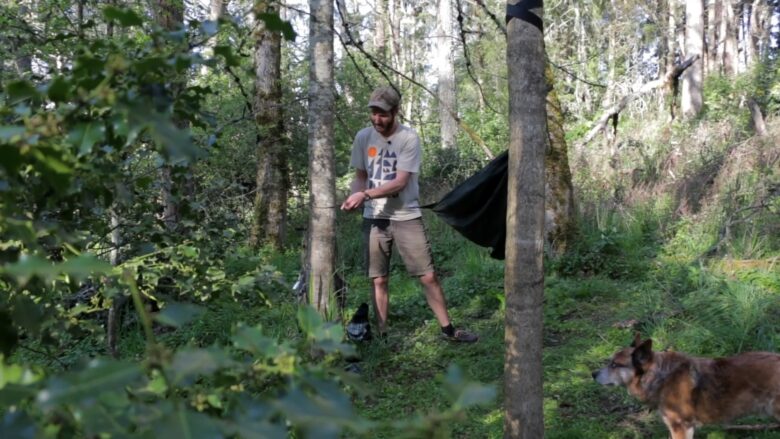
- I then take my hammock and put it in between the two trees and figure out how tight I need to tie it in order for it to be hanging the way I like it.
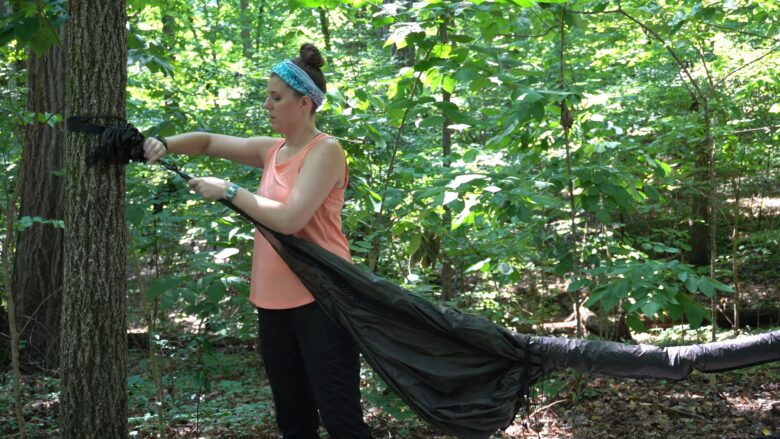
- Next, I tie it as tight as I think I need it using the hitch shown below. I do it on both sides so that my hammock is sitting right where I want it.
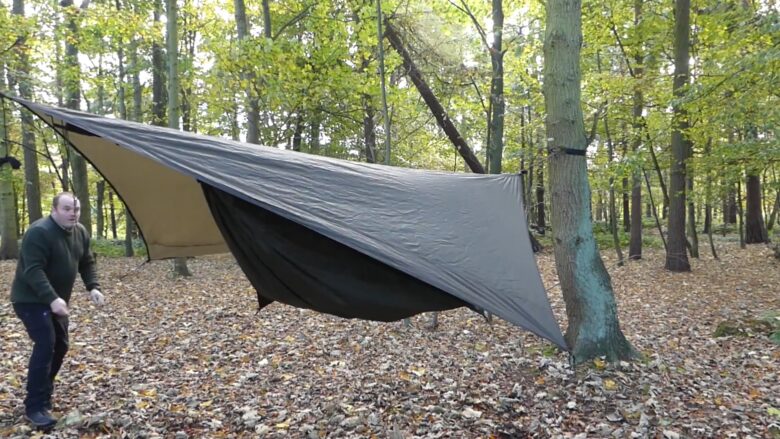
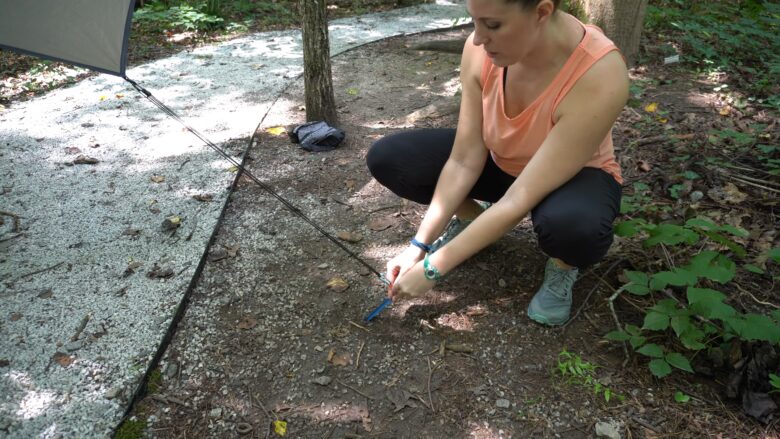
- I take some pegs, or something to use as a substitute, and peg down the guy lines so that my bug net is hanging properly. Now I just need to set up the rain fly (which was included).
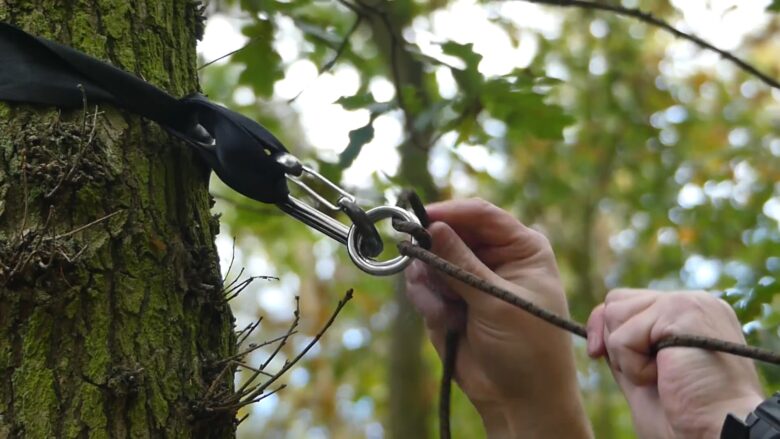
- To set up the rain fly I just clip the two clips on it to the prusik knots on the Hennessy Hammock’s suspension cord. Then I pull the knots away from the hammock to add the desired tension to it.
- Lastly, I just Peg down the guylines for my rain fly and I’m completely done and ready to go.
This might seem like it would take quite a while and would be a pain to set up every time you go camping but it really is super easy. I can set it up in a matter of a few minutes and was able to do so after only one or two times setting it up. The only skill that you need to have is being able to tie the hitch which I learned in a few minutes and will try and teach you right now.
Tying The Hitch
As I just said, this is really the only skill that you need to know to set up your Hennessy Hammock. This will be the most difficult part to learn but it is super easy to actually do. Here is how you tie the hitch to attach your Hennessy Hammock’s suspension to its tree straps.
- First, you are going to feed the cord of the suspension through the loop on the tree strap and pull it tight towards your hammock.
- Next, you are going to take the end that you fed through the loop and bring it down and around itself on the other side of the loop.
- Now you’re going to follow the cord as it had gone through the loop before, making a figure eight and wrapping it around the webbing of the loop.
- You’re going to follow the cord again around the tensioned line as you did before continuing to create a figure-eight shape.
- Continue to do this number of times. The bag suggests doing four figure eights worth, but more wouldn’t hurt.
The great thing about doing this hitch instead of a knot, especially the knots that people who are not experts use, is that the hitch shouldn’t become so tight that it is super difficult to untie.
I know that these directions may be hard to understand however here’s an image that I’ve created in order to show how the hitch should be tied. I’m not a great artist but hopefully, you are able to get the idea here. If not keep reading for other ways that you can set up your Hennessy Hammock. Make sure the loops are pulled night every time though; it should not be loose like in the picture.
Benefits to Using the Official Setup Method
I think the biggest benefit to using the official setup method for your Hennessy Hammock is how easy it is for the rainfly to attach to the suspension. This really only works this well for two reasons.
The first reason this works is that the hammock has a ridgeline, and the second reason is that the Hennessy Hammock’s built-in suspension cord is made to be long enough so that you can tighten the rain fly using the prusik knots that it comes included with. This is unique and would be hard to do with a webbing strap.
Cons to Using the Official Setup Method
In my opinion, the worst thing about using the official setup method that comes with a Hennessy Hammock is the lack of adjustability after being set up. With most hammocks, you do need to do a little bit of work to adjust the suspension but with the Hennessys you have to re-tie the hitch on each side. It could be worse but to me, that’s the biggest downfall with this setup, however, you get better at figuring out how many lines you need after a few uses.
Other Methods for Setting Up Your Hennessy Hammock
There are other methods that you can use for setting up your Hennessy Hammock. One of the biggest downfalls to using methods other than the official one is that you are most likely going to have to set up your rain fly on its own.
Again, please remember that there are risks involved any time you use a hammock, and any time you are using a hammock you are doing so at your own risk. Make sure that you take the time to inspect your work and make sure you are making any modifications to your hammock properly. Always get into your hammock slowly and sit down before laying down.
It’s also worth noting that Hennessy Hammocks have released two different versions of gathered ends for their products. I will be talking about the newer version of the ends. In order to determine which you have, you need to cut the plastic tie that’s holding the sheath onto the end of your hammock and slide it back to reveal the place where it’s attached to the suspension.
If your hammock has the end that’s pictured below then you are good to go. If you’re in has two holes in it ( instead of the continuous loop in the picture) then click here for an explanation on how to attach a whoopie sling to your type of hammock.
Whoopie Sling
The benefit to using a whoopie sling for your suspension is how easy it is to adjust after you set it up. Installing a whoopie sling into a Hennessy Hammock is a fairly common modification. If your hammock has the end pictured above then and this will be easy.
With most hammocks I would remove the continuous loop and install the whoopie sling into the end channel, however, I feel that it is easiest to install the whoopie sling directly to the continuous loop on this type of gathered end hammock. Perhaps in the future, I’ll make a detailed guide on how to do this, however, for this post a simple step-by-step instruction will work.
Installing your Whoopie Sling:
- You will need to get the sheath out of the way by cutting the twist tie and sliding it up off the gathered end of your hammock.
- First, feed one end of the whoopie sling through the continuous loop on the end of your hammock.
- Next, feed the adjustable loop (the big loop) through the fixed eye at the other end of the hammock.
- Now You are done, you can put the sheath back if you wish.
To set up the hammock after installing the whoopie sling you can use a couple of different methods. You could use a carabiner through the adjustable end of the whoopie sling, however, I prefer to use long webbing straps with a toggle and a Marlin Spike Hitch. I wrote a little bit about that method of setting up in my post about different types of straps.
Once you have the whoopie sling installed and your hammock set up, you can easily adjust your hammock by pulling on the loose end coming out of the center of the whoopie sling. By pulling on this loose end you will adjust the size of the adjustable loop
Continuous Loop and Easy Webbing straps
The continuous loop at the end of the Hennessy Hammock that I have is so tight that I don’t want to clip a carabiner directly onto it, however, I personally would tie another loop around there in order to clip a carabiner onto that loop. Once you have a carabiner hooked on to the end of your hammock you should be good to go as far as using easy straps is concerned.
When I am talking about “easy straps” I am referring to straps such as the Eno Atlas, although there are many other brands of them as well. The straps have loops going down the whole strap so that you don’t have to tie your own loop or any sort of hitch in order to hook it up.
The loop that I am tying onto the end of my hammock will be tied using a piece of static cord that can hold my weight. To do this I am creating a loop with the cord and tying an overhand knot around either end of it. These knots will be able to slide but each of the knots will prevent the other from slipping through one another and the loop will hold.
Here is another crudely picture of what I mean;
What Happens When You Cut the Continuous Loop?
As I said a couple times here, I am not cutting my continuous loop when I am doing either of these methods. I’m not sure what happens if I do cut it but if you watch the video for the older style of Hennessy Hammock gathered ends that I linked above, you will see that he needs to reattach the ridgeline when he is attaching his specially made whoopie sling.
One reason that I’m not cutting the continuous loop is that I do not want to mess around with the ridgeline of my hammock. I really like the way that my Hennessy Hammock works. I’ve been using often and I want to continue using it the way it was designed. I paid for it and do not have the budget to accidentally break it.
If you have cut your continuous loop on your Hennessy Hammock’s gathered end then please let me know in the comments. I would be interested in hearing what that’s like since it is hard to see.
Setting Up The Rain Fly Separately
After I modify my Hennessy Hammock I will always use the rain fly separately. You may be able to take the prusik knots out and reattach them to the whoopie sling, however, the whoopie sling website says otherwise.
I would, however, suggest taking the prusik knots off of the original cord so that you can use it with the ridgeline that you are going to make for your rain fly. Prusik knots are really easy to tie, you just have to take the loop and wrap it inside itself twice. If you need more information than that you can search on “How to tie a prusik knot” on Google; it’s really easy to find.
To create a ridgeline for your fly I would suggest that you use some sort of strong and static cord and attach the prusik knots to it. Now all you have to do is tie the cord tight between two trees, ideally a few feet higher than your Ridgeline, and clip the rain fly into the prusik knots. peg down the sides of your fly and you are done.
All in All
All in all, setting up a Hennessy Hammock is not too difficult at all. At first, it may be overwhelming when you open the bag and see that you have to tie knots or hitches but you should be able to learn how to do it properly after only a couple of uses. It won’t take long before you are able to set up your hammock in minutes.
There are other ways to set up your hammock but they do take a little bit of modification. If you want to, you can set up your hammock with whoopie slings which makes it way more easily adjustable, or you can modify it to be able to us easy hammock straps which makes it even quicker to set up.
However, you choose to set up your hammock is totally up to you. Just make sure that you are safe and are careful to do everything correctly while you are tying knots or making modifications to your setup.
Please let me know if there are other ways that you have used to set up your Hennessy Hammock. I would love to hear about it in the comments below!